How to Build a Greenhouse: A Step-by-Step DIY Guide
A weekend or two of work, a level site, and a clear plan will get a small backyard greenhouse standing and growing. This guide walks you through site, foundation, frame, glazing, and climate control in the order a confident DIYer should tackle them, whether you build from scratch or assemble a kit from our greenhouse kits collection. Expect basic carpentry skill, a helper for panel lifting, and a realistic two-to-four-day build for an 8x8 freestanding structure.
TL;DR: Building a greenhouse takes six steps: choose a sunny, sheltered site, set a frost-proof foundation, raise a braced frame, install glazing, add ventilation, and outfit the interior. A small DIY build runs two to four days for someone with basic carpentry skills. A kit cuts that to a day with no cutting or design work.
DIY vs Kit: Decide This First
Decide between a from-scratch build and a kit before buying anything, because it changes every later step. A scratch build saves on materials, especially with salvaged windows, but demands real carpentry time and tolerance for mistakes. A kit arrives pre-cut with instructions and assembles in a day. Kits also carry tested snow and wind ratings that homemade frames rarely match.
A scratch build wins on customization and raw material cost. A kit wins on speed, predictability, and engineering. University greenhouse guidance stresses that covering choice and frame strength drive both cost and growing performance for years, so a tested kit removes the biggest guesswork from a first project. If you want a deeper cost-and-effort breakdown, the building versus purchasing a greenhouse comparison lays out where each approach actually pays off.
Whichever you pick, the site and foundation work below applies to both, since even a kit needs a flat, drained, anchored base to last. The steps that follow assume a small freestanding structure, but the same logic scales up or attaches to a wall, and it adapts to a delivered kit just as cleanly as to a pile of cut lumber.
Step 1: Choose the Right Location
Pick a spot with at least 6 hours of direct daily sun, shelter from strong wind, good drainage, and easy access to water and power. Sun is the single biggest factor: low winter light makes a poorly placed greenhouse useless in the season you most want it. Observe the site across a full day before you dig anything.
A south-facing position along a house wall, fence, or hedge captures passive solar heat while blocking wind, which lowers your heating load in winter. Avoid low spots where water pools and shade from deciduous trees that still cast bare-branch shadows in winter. Run water and power lines from the house if you plan to irrigate or heat.
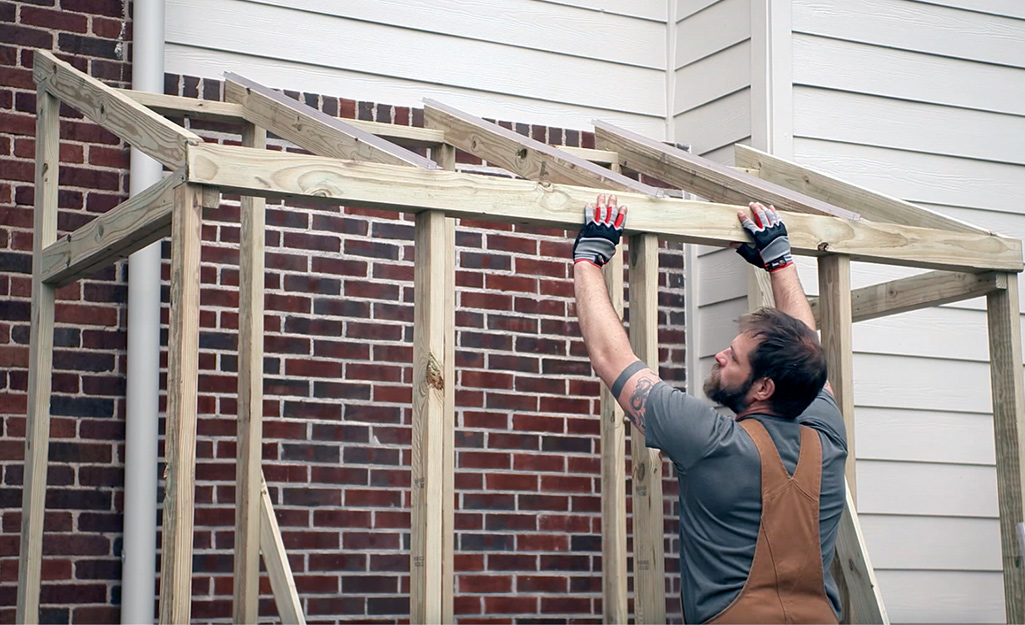
an image of a man building a lean to greenhouse
For a full breakdown of orientation, windbreaks, and sun mapping, read the guide on the best location for a greenhouse. Mark your corners only after you have watched the sun cross the site and confirmed water flows away, not toward, the pad.
Step 2: Build a Solid Foundation
A greenhouse foundation must carry the structure’s weight, resist wind uplift, and sit below the frost line so winter heaving cannot lift or crack it. Bury wood or anchored frames at least 1 foot deep, and 2 feet or more where winters freeze hard. Frost depth varies by region, so check your local frost line before you set footings.
Build a rectangular perimeter frame to your exact greenhouse dimensions using rot-resistant lumber such as cedar, redwood, or treated pine, joined at the corners with galvanized brackets and screws. Inside the frame, lay 4 to 6 inches of paver-base gravel, compact it, then top with a 2-inch leveling layer of sand. Landscaping fabric under the gravel keeps weeds down.
University of Georgia greenhouse engineering data shows an uninsulated perimeter loses heat at roughly twice the rate of an insulated one, with the perimeter heat-loss coefficient dropping from 0.8 to 0.4 once you add edge insulation (University of Georgia Extension, Bulletin B792). Wrapping the foundation edge with rigid foam board pays back every winter you heat the space.
Step 3: Assemble the Frame
Once the base is level and drained, build the frame from wood, aluminum, steel, or PVC, then brace it diagonally before the glazing goes on. Each material trades off differently: wood is easy to customize, aluminum is light and rust-free, steel is strongest for large spans, and PVC is cheap but hard to modify later. Follow your plans or kit instructions joint by joint.
For a small or mid-size wood greenhouse, frame with 2x4 or 2x6 lumber and connect corners and joints with metal brackets, which keeps future modifications simple. Rot-resistant species hold up best outdoors, and the cedar greenhouse collection shows pre-engineered cedar frames if you would rather not mill your own. Aluminum kit frames assemble fast and never rust. Steel suits larger structures but needs precise, square assembly. Add diagonal bracing on the walls and corners regardless of material, since an unbraced frame racks under wind and snow.
Lay out and square every wall on the ground first, then stand and fasten them. Check diagonals corner to corner: equal measurements mean the structure is square, which matters because rigid glazing panels will not seat cleanly on a racked frame. Anchor the frame to the foundation before moving on.
Step 4: Choose and Install Glazing
Glazing is the covering that defines greenhouse performance, and the realistic choice is glass, polycarbonate, or polyethylene film. Glass gives the highest clarity and lasts decades but is heavy, fragile, and expensive. Twin-wall polycarbonate insulates far better at lower cost. Film is cheapest but tears and degrades within a few seasons.
University of Florida greenhouse guidance notes that polyethylene film has high light transmittance but a short life, often around a year for standard grades, while glass transmits light well and lasts 25 years or longer (University of Florida IFAS, AE016). Double-layer poly cuts heat loss 35 to 40 percent for only about a 10 percent drop in light, which is why twin-wall panels dominate modern home greenhouses.
The insulation gap is measurable. University of Georgia data lists an R-value near 0.83 for single-layer polyethylene and 0.91 for single glass, rising to about 2.00 for double-wall acrylic or polycarbonate (University of Georgia Extension, Bulletin B792). That roughly doubled R-value is the difference between fighting every cold night and holding heat with less fuel.
Measure and cut panels to fit the frame, then fasten with the manufacturer’s recommended clips, screws, and rubber washers. Seal roof joints with silicone, keep condensation drainage channels clear, and install any roof vents before the final panels go up. For glass kits, tempered-glass panels are engineered for safe, long-term glazing. Set the roof at a minimum 14-degree slope so rain and condensation run off instead of pooling.
Step 5: Add Ventilation and Temperature Control
Ventilation prevents the heat buildup and stagnant, disease-prone air that kill greenhouse plants faster than cold does. Combine roof vents that let rising hot air escape, sidewall shutters that pull cool air in at plant level, and a small circulation fan. Automatic temperature-triggered openers handle the daily swing when you are away from home.
Most plants want roughly 60 percent humidity and a clear day-to-night temperature drop. Vents and fans manage both: opening vents on sunny days cuts condensation and stuffiness, while moving air inhibits fungal growth. The seasonal targets below give you a working range to dial in heating, venting, and shading across the year.
Season
Day Temperature
Night Temperature
Spring
65-75°F (18-24°C)
55-65°F (13-18°C)
Summer
75-85°F (24-29°C)
65-70°F (18-21°C)
Fall
65-75°F (18-24°C)
50-60°F (10-16°C)
Winter
55-65°F (13-18°C)
45-55°F (7-13°C)
In hot, dry climates an evaporative cooler holds temperatures down; in humid regions an exhaust fan and a dehumidifier reduce stickiness and disease pressure. To winterize, you simply reverse the logic: ventilate briefly on sunny days, then seal up at night, add thermal mass like water barrels to store daytime heat, and keep plants off the cold floor on benches.
Step 6: Customize: Benches, Shelves, and Irrigation
Outfit the interior to grow upward and stay organized, because floor space alone wastes most of a greenhouse’s volume. Add waist-height benches for comfortable potting, tiered wall shelves for seed starting, and hanging baskets or vertical racks overhead. A potting bench, storage bins, and tool hooks turn the space into a working room rather than a parking spot for pots.
Irrigation is the upgrade that frees you from daily hand-watering. Drip lines, misters, and foggers deliver water efficiently, and a timer or a moisture sensor automates the whole system. Pair automated watering with auto vent openers and the greenhouse largely runs itself on workdays, holding humidity and temperature steady while you are out.
a product image of the Hoklartherm Riga Greenhouses 3S
A lean-to greenhouse makes the customization step easier still, since one wall is already your house or fence and you only outfit three sides. However you lay it out, leave clear aisles wide enough to move plants and a wheelbarrow without knocking shelves.
Common Greenhouse-Building Mistakes
The mistakes that ruin first builds are predictable: too little sun, a foundation above the frost line, no diagonal bracing, and skimped ventilation. Each one shows up later as a cold, flimsy, or moldy greenhouse. Avoiding them costs almost nothing at the planning stage and saves a teardown.
Underbuilding the foundation tops the list. A frame set above the frost line heaves and racks in the first hard winter, and skipping edge insulation roughly doubles perimeter heat loss according to University of Georgia Extension data, which means a colder space and higher fuel bills. Dig deep, anchor well, and insulate the perimeter.
The other frequent errors are glazing too thin for the climate and ventilation treated as an afterthought. Single-layer film or 4mm panels may not hold winter heat where twin-wall poly would, and a greenhouse without enough vent area cooks plants on the first warm spring afternoon. Match glazing thickness to your winters and size venting for your hottest day, not your average one.
FAQs
Do I need a building permit to build a greenhouse?
It depends on your municipality and the structure’s size. Many areas exempt small, non-permanent greenhouses but require permits for larger ones with foundations or utilities. Check local zoning and setback rules before you build, since requirements vary widely by town and county.
How long does it take to build a backyard greenhouse?
A small 8x8 freestanding greenhouse takes most DIYers two to four days, spread across site prep, foundation, frame, and glazing. A pre-cut kit assembles in roughly a day with two people. Curing time for any concrete footings adds a day or more before you load the frame.
Can I build a greenhouse on grass or soil without a foundation?
Not for a structure you want to last. Bare grass or soil shifts, drains poorly, and lets the frame heave with frost. A compacted gravel-and-sand base inside an anchored perimeter frame gives drainage and stability, and you can still keep a soil growing bed inside it.
What is the easiest greenhouse type for a first-time builder?
A small freestanding structure with a simple wood or PVC frame is the most forgiving first build. Lean-to designs that attach to an existing wall save materials but demand cleaner carpentry where the two structures meet. A kit removes the hardest part, the cutting and engineering, entirely.
How do I keep a homemade greenhouse from blowing over?
Anchor the foundation frame below the frost line and add diagonal bracing to every wall and corner so the structure resists racking. Position it behind a windbreak such as a fence or hedge, and choose glazing rated for your wind zone. Unbraced, unanchored frames are the ones that fail in storms.
Ready to grow sooner with less guesswork? If a full scratch build sounds like more weekend than you have, a tested kit gets you to planting in a day with snow and wind ratings already engineered in. Browse footprints, frames, and glazing across our full range and pick the one that fits your site and your skill level.


Leave a comment