Running electricity to a gazebo means trenching a wire from your home’s panel out to the structure, landing it in a weatherproof junction box, and protecting it with GFCI. The detail that trips people up is burial depth, and it is not one flat number. Under the National Electrical Code (NFPA 70, Article 300.5), how deep you dig depends on the wiring method and whether the circuit is GFCI-protected: a GFCI-protected 120-volt, 20-amp residential branch circuit in PVC conduit can sit as shallow as 12 inches, while unprotected direct-burial cable wants 24 inches.
Power turns a permanent outdoor gazebo from a daytime-only spot into a place you actually use after dark, with lights, fans, and music. By the end of this guide you will know what the job involves, how to choose between conduit and direct-burial cable, what code requires for depth and protection, and where the line is between a smart weekend prep job and work you should hand to a licensed electrician. This is permitted, inspected electrical work in most jurisdictions, so treat it that way.
TL;DR: Burial depth follows NEC 300.5, not a single rule: rigid metal conduit 6 in, PVC conduit 18 in (12 in for a GFCI-protected 120V/20A residential circuit), and direct-burial UF cable 24 in (18 in with GFCI protection on that same circuit). All outdoor receptacles need GFCI protection and weatherproof in-use covers. Pull a permit and have it inspected.
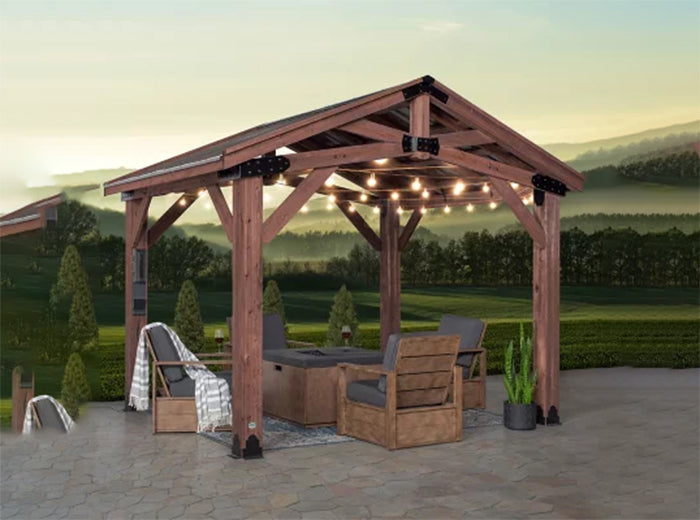
wooden gazebo with string lights and outdoor seating
Plan What the Gazebo Needs to Power
Before anyone digs, add up the load. A small lighting-and-outlets setup might draw under 10 amps, but the moment you add a ceiling fan, a mini-split, or a hot tub, you are sizing a much bigger circuit, and undersizing it now means re-trenching later. Most detached gazebos run on a dedicated 15- or 20-amp 120-volt circuit; bigger plans push you toward a 240-volt feed or a small subpanel.
Walk through everything you might power, now and in a few years:
Lighting, indoor and out: recessed cans, pendants, string lights, path and stair lighting. LED keeps the load low.
GFCI-protected outlets around the perimeter for phones, blenders, tools, and seasonal decor.
Switches, dimmers, and smart controls to set up lighting zones.
Comfort gear: a wet-rated ceiling fan, an electric patio heater, or a mini-split for shoulder-season use.
Entertainment: speakers, a TV, or A/V gear, which adds steady draw.
Future loads like a hot tub or outdoor kitchen. Size the circuit and conduit for where you are headed, not just today.
Add up the wattage of everything on the circuit, divide by your voltage (120 or 240), and you have the amperage your breaker, wire gauge, and hardware must handle. Building in headroom now is far cheaper than reopening a trench. If you are still deciding what the space is for, our gazebo buying guide walks through matching features to how you will actually use the structure.
Choose Between Conduit and Direct-Burial Cable
You have two ways to get power across the yard: run wires inside protective conduit, or bury UF (underground feeder) cable directly in the trench. Conduit protects the wires, lets you swap them later without re-digging, and is required wherever wiring is exposed above grade, such as the riser climbing your gazebo post. Direct-burial UF is faster and cheaper for a clean, undisturbed run, but a future shovel or aerator can cut it, and a damaged section means re-trenching the whole length.
A heuristic you will see everywhere says “use conduit for runs over 50 feet, direct burial for runs under 50 feet.” Treat that as a cost-and-practicality rule of thumb, not a code line. There is no 50-foot threshold in the NEC, which cares only about correct burial depth, GFCI protection, listed materials, and proper transitions. The 50-foot guidance simply reflects that conduit’s labor and replacement savings usually win on long runs, while direct burial is the economical pick on short ones.
electrical conduit on gazebo post
Factor
Conduit (PVC or rigid metal)
Direct-burial UF cable
Wire protection
High; rigid enclosure resists crushing and digging
Low; only the cable jacket protects the conductors
Moisture resistance
Excellent when sealed and sloped to drain
Good initially, degrades with age
Future repairs
Pull and replace wire without re-trenching
Re-dig and re-run the damaged section
Install effort
More planning, glued or threaded joints
Lay in the trench and backfill
Upfront cost
Higher
Lower
Best for (cost, not code)
Long or exposed runs
Short, undisturbed runs
Know the Burial Depths Code Actually Requires
Burial depth is set by NEC Article 300.5, and it changes with the wiring method and whether the circuit is GFCI-protected, so there is no single “bury it this deep” answer. For a residential branch circuit feeding a gazebo, the minimum cover (measured from the top of the conduit or cable to finished grade) breaks down like this: rigid metal conduit, 6 inches; PVC conduit, 18 inches; direct-burial UF cable, 24 inches. The code then allows reduced depth for a common residential case: a 120-volt circuit rated 20 amps or less that is GFCI-protected drops to 12 inches for PVC conduit and 18 inches for direct-burial cable. Those reductions are a real, code-sanctioned benefit of running GFCI protection, not a shortcut.
Two practical notes. First, those are minimums to the top of the raceway, so dig the trench a few inches deeper to seat conduit on undisturbed soil or a sand bed. Second, if the run crosses under a driveway or other vehicle area, depth requirements increase, and frost, local amendments, and utility rules can add their own demands. When in doubt, the depth your inspector signs off on is the one that counts.
installing electrical wiring in gazebo
What the Job Involves, Step by Step
Here is the shape of a gazebo electrical run so you know what you are signing up for. Several of these steps, the panel work in particular, are where most homeowners should bring in a licensed electrician.
1. Tie into the house panel
A new dedicated breaker, sized to your calculated load, goes in the main panel, and a knockout is opened to bring the new circuit out toward the trench. This is live-panel work: it means killing the main, confirming the panel is dead, and landing conductors correctly. Outdoor-rated wire such as UF cable or THWN conductors in conduit carries the circuit from here.
2. Trench and run the underground leg
Dig to the depth your method and GFCI status require (see the table above), keeping bends gentle so wire pulls cleanly. Conduit gets supported and its joints sealed; direct-burial cable gets bedded in sand or screened, rock-free soil so backfill cannot nick it. A run of warning tape buried above the line gives the next person with a shovel a heads-up.
3. Transition into the gazebo
Where the line surfaces, it lands in a weatherproof exterior junction box, then transitions to interior-method wiring run through the gazebo framing to your outlets and fixtures. Raintight fittings (an LB conduit body is common) handle the indoor-to-outdoor transition, and there should be no exposed copper anywhere.
4. Install outlets, switches, and fixtures
Every outdoor receptacle gets GFCI protection and a weatherproof in-use cover (the bubble-style cover that keeps the outlet shielded while a cord is plugged in). Boxes and fixtures on exterior walls or ceilings must be outdoor-rated, connections are pigtailed and tight, and exterior boxes are caulked against moisture. A ceiling box, in particular, has to be braced to carry a fixture’s weight and motion, which matters if you plan to hang a fan overhead. Low-voltage runs like landscape lighting and speakers stay separate from the 120-volt feed.
5. Inspect, test, and energize
Before power goes back on, the work is checked for code compliance and, in most areas, inspected by the building department. Once it passes and is energized, every GFCI is tested with its test/reset buttons, outlets are checked for correct wiring and ground, and the new breaker is labeled in the panel.
man installing electrical wiring in gazebo
Safety, Permits, and When to Call a Pro
Outdoor gazebo wiring is governed by the NEC and your local code, and getting it wrong creates real shock and fire risk, so a few rules are non-negotiable. Every outdoor receptacle must be GFCI-protected, every outdoor box and outlet needs a weatherproof in-use cover, all materials must be listed for wet or damp locations, and the project almost always requires a permit and an inspection. GFCI protection is the single most effective device for preventing shock at outdoor outlets, which is exactly why code reduces the required burial depth when you use it.
Be honest about scope. Planning the layout, calculating the load, and digging the trench are reasonable homeowner tasks. Opening the main panel, sizing a new breaker, and making the final terminations are where a small mistake turns dangerous, and in many jurisdictions that panel work legally must be done or signed off by a licensed electrician. The smart move is to consult or hire one, let them handle the panel and connections, and schedule the inspection. That protects your home, your insurance, and the next person who touches the system. The Electrical Safety Foundation International publishes plain-language guidance on safe outdoor electrical use if you want to read up first. Treat any instruction here as “what the job involves,” not a license to wire a live panel yourself.
FAQs
Do I need a permit to run power to a gazebo?
Almost always, yes. Most jurisdictions treat a new outdoor branch circuit as permitted, inspected work regardless of distance. Check with your local building department before you start, because skipping the permit can void insurance coverage and complicate a future home sale.
Does gazebo wiring need to be in conduit?
Not always underground, but often. Direct-burial UF cable is allowed in the trench at code depth, yet conduit is required wherever the wiring is exposed above grade, such as the riser running up your gazebo post. Conduit also lets you replace wires later without digging, which is why many installers use it for the full run.
Is a GFCI outlet required outdoors?
Yes. The NEC requires GFCI protection for outdoor receptacles, and it is one of the most important safety features in any outdoor installation. As a bonus, GFCI-protecting a 120-volt, 20-amp residential circuit lets you bury PVC conduit at 12 inches and direct-burial cable at 18 inches instead of the deeper standard depths.
Hi – great article, thanks for sharing! I have a few questions re: the pic at the bottom of the post; I have the same gazebo and love that set up! 1) what sunshades did you use? 2) what TV mount did you use in the corner? and lastly, 3) is the fireplace natural gas fueled I assume, in order to be that close to the gazebo/structure? ——— Backyard Oasis replied: HI – we don’t use any sunshades. Tv mount we bought at our local best buy but you want to get one that is rated for hte outdoors. The fireplace was propane, but controlled through a tank.
Andy
Operations Manager
Backyard Oasis
(725) 529-9725
Joe Huzyak - April 29, 2024
Does this structure need to be grounded? (Ground rod connected to subpanel and driven into ground)
Leave a comment
About The Author
Andy Wu - Resident Expert
Andy Wu is the resident backyard products expert and hails from Atlanta, Georgia. His passion for crafting outdoor retreats began in 2003.
As a fellow homeowner, he founded Backyard Oasis to provide top-quality furnishings and equipment, collaborating with leading manufacturers.
His main focus is on sheds and generators!
In his spare time he like to hike the tallest mountains in the world and travel with his family.


Comments
Leave a comment